How To Maintain and Clean Your White Shaker Cabinets
Keep your white kitchen cabinets looking flawless year-round with a few simple habits and smart strategies tailored for long-lasting beauty.
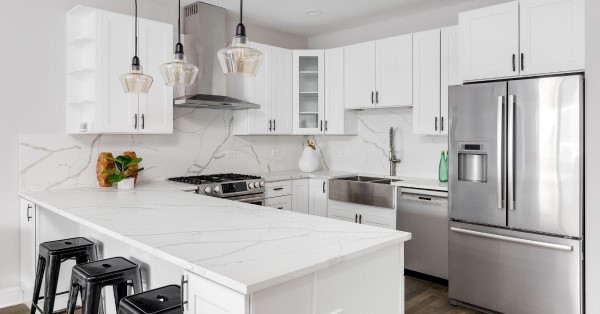
White shaker cabinets instantly brighten a kitchen with clean lines and timeless appeal. Their versatile design works across traditional and modern spaces, making them a favorite choice for remodeling projects.
Let’s face it, white cabinets show every fingerprint, cooking splatter, and dust bunny that darker cabinets might hide. But don’t worry—with a smart approach to care, homeowners can keep them looking crisp and elegant for years.
Start With Routine Daily Habits
Wiping cabinet doors with a damp microfiber cloth after meals prevents buildup from setting in. Cooking grease, condensation, and airborne dust collect fastest around handles and lower corners near appliances. A quick dry with a clean towel stops water spots from leaving streaks on painted surfaces.
Focus attention on high-touch areas such as drawer pulls, edge molding, and frames closest to prep zones. Even light-colored oils from your hands gradually tint paint if left alone for too long. Using warm water mixed with gentle dish soap works well for daily cleaning without dulling the finish.
Avoid commercial sprays with unknown ingredients that might strip paint or leave a sticky residue. Daily care doesn’t need to feel like a chore when you stick to a consistent, simple routine. Regular touch-ups prevent grime from settling into grooves or seams, keeping surfaces sharp and smooth.
One easy way to maintain and clean your white shaker cabinets involves using two separate towels—one for wet wiping and another for drying. Keeping materials on hand near the kitchen helps build habits that protect your investment. Clean as you go to avoid bigger projects later on.
Deep Cleaning Without Damage

Monthly deep cleaning resets your cabinets by removing buildup you may have missed during daily wipe-downs. Start by mixing a solution of warm water and white vinegar or a pH-neutral cleaner designed for painted wood. Use a soft sponge and move in smooth, circular motions across panels and frames.
Focus on crevices where oils and dust hide, especially around inset doors and trim work. Work section by section to avoid drenching wood and causing swelling near joints. After cleaning, always rinse with a damp cloth, then immediately dry with a separate towel to remove all moisture.
Avoid harsh scrubbing pads or rough brushes that scratch the surface and create dull patches. Cleaners labeled for heavy-duty use often contain ingredients too aggressive for cabinet paint. Stick to non-toxic, low-odor options for both safety and finish preservation.
A smart strategy to maintain and clean your white shaker cabinets includes regular deep cleans between seasons. Dust buildup increases in winter due to closed windows and rises again in summer from open windows that introduce pollen and outdoor particles into your kitchen.
Spot Treatment for Stains and Yellowing
Stains around door handles, appliance edges, and splash zones form quickly without regular attention. Baking soda and water make a mild paste that lifts grime without scratching. Apply with a soft cloth, let it sit briefly, then wipe clean.
Yellowing often appears near heat sources like ovens and dishwashers due to rising steam. Use diluted hydrogen peroxide with a cotton swab to treat those areas carefully. Always test any cleaning product in an inconspicuous spot before applying it to all your cabinets.
For ink marks or tougher stains, try rubbing alcohol on a microfiber cloth and dab gently. Avoid wiping in wide motions, as that could spread the mark across the cabinets. Focus on cleaning directly where the mark or stain is on the cabinets. Use a fresh section of cloth for each dab to avoid redistributing the mess.
Avoiding Harmful Cleaning Mistakes
Soaked cloths left too long on painted wood often lead to peeling or water damage. Always wring out excess moisture and avoid pooling water near seams or drawer edges. Wood cabinets need cleaning, not soaking.
Magic Erasers, while popular, remove paint when used too forcefully. Stick to soft tools and non-abrasive solutions unless spot-testing confirms safety. Shine comes from preserving surface integrity, not buffing away flaws.
Spraying cleaner directly onto cabinets causes streaking and often pushes moisture into creases. Instead, spray onto your cloth to control application and avoid dripping. You’ll waste less product and achieve a more even finish.
Even natural products like lemon juice or vinegar become harmful if not used properly. The secret is in the technique: apply, clean briefly, and rinse thoroughly. Never let any cleaner sit on your cabinets for extended periods of time. How you clean matters just as much as what you clean with when preserving your cabinets.
When To Reseal, Repaint, or Replace
Peeling edges, dull patches, and fading corners signal it may be time for a touch-up or reseal. Small chips or cracks often appear on lower cabinets near high-traffic areas. Addressing those quickly prevents larger peeling or moisture absorption.
Use a fine brush to apply touch-up paint matching your original finish. Sand lightly only if needed, and work in good light to spot coverage gaps. Avoid overpainting, which creates uneven patches visible at an angle.
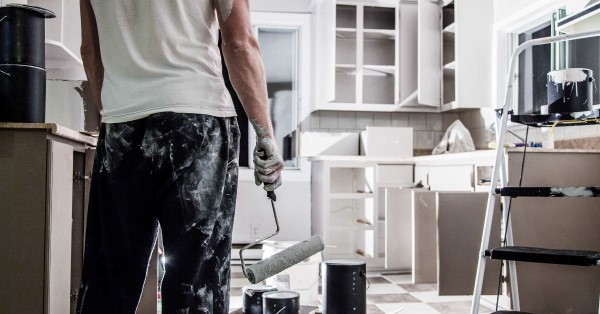
Consider refinishing the full set if widespread wear occurs across multiple doors or drawer fronts. Sanding down and repainting with a cabinet-grade enamel can restore a uniform look. In some cases, damage beyond repair might call for replacement.
Homeowners can explore stylish upgrade options through iDeal Floors, where you’ll find quality kitchen cabinets for sale to match your needs. Whether you want to refresh your current layout or start fresh, their product line offers durability and design flexibility.
Working with a team that understands both form and function saves time and improves results. Making smart material choices at the start reduces upkeep for years ahead.
Cleaning and Caring for Hardware
Cabinet hardware collects grease, grime, and food residue just like the doors themselves. Use a toothbrush dipped in warm soapy water to clean grooves in knobs and pulls. Rinse with a damp cloth and dry thoroughly to avoid corrosion.
Brushed metal and matte black finishes require special care to prevent spotting or discoloration. Avoid citrus-based cleaners and focus on pH-balanced products designed for metal surfaces. Always dry hardware immediately after cleaning to prevent water damage around screw holes.
Hinges benefit from occasional lubrication to reduce squeaks and preserve alignment. Apply silicone spray sparingly to moving parts, then open and close the doors a few times. Tighten loose screws as needed to keep doors aligned and prevent sagging.
Small details like shiny knobs and smooth hinges add to the visual impact of white shaker cabinets. When hardware looks clean and feels sturdy, the entire kitchen feels well cared for. Including hardware in your maintenance routine prevents gradual decline and supports cabinet longevity.
When it comes to finding the right style for your home, iDeal Floors offers a wide range of durable, design-forward cabinetry and expert guidance for your kitchen upgrade. Our team specializes in helping homeowners like you find cabinetry that not only impresses your guests but also stands up to real-life cooking, kids, and everyday use without becoming a maintenance nightmare.
About the Author

Comments